I transform tiny baths with a white subway foundation, then pop in textured mosaics to play up interest without crowding. I extend tile up walls, lean into vertical patterns to stretch space, and pick glazed finishes for easy-clean shine. I plan grout to blend or pop for subtle depth, and I use warm lighting to boost size and mood. Curious about more smart layouts and luxe touches? Keep going to uncover all the favorites that really work.
How Tile Transforms Tiny Bathrooms Into Luxe Spaces
Tile can do more than just cover a wall; it can open up a bathroom and feel like a spa.
I’m guiding you through smart tile choices that visually expand tiny spaces, from reflective surfaces to elongated layouts.
I’ll keep lines clean, colors cohesive, and textures subtle, so every inch earns calm luxury without crowding.
You’ll finish with a serene, luxe feel.
Incorporating luxurious bathroom tile inspiration elevates the aesthetic and adds timeless elegance to any small bathroom.
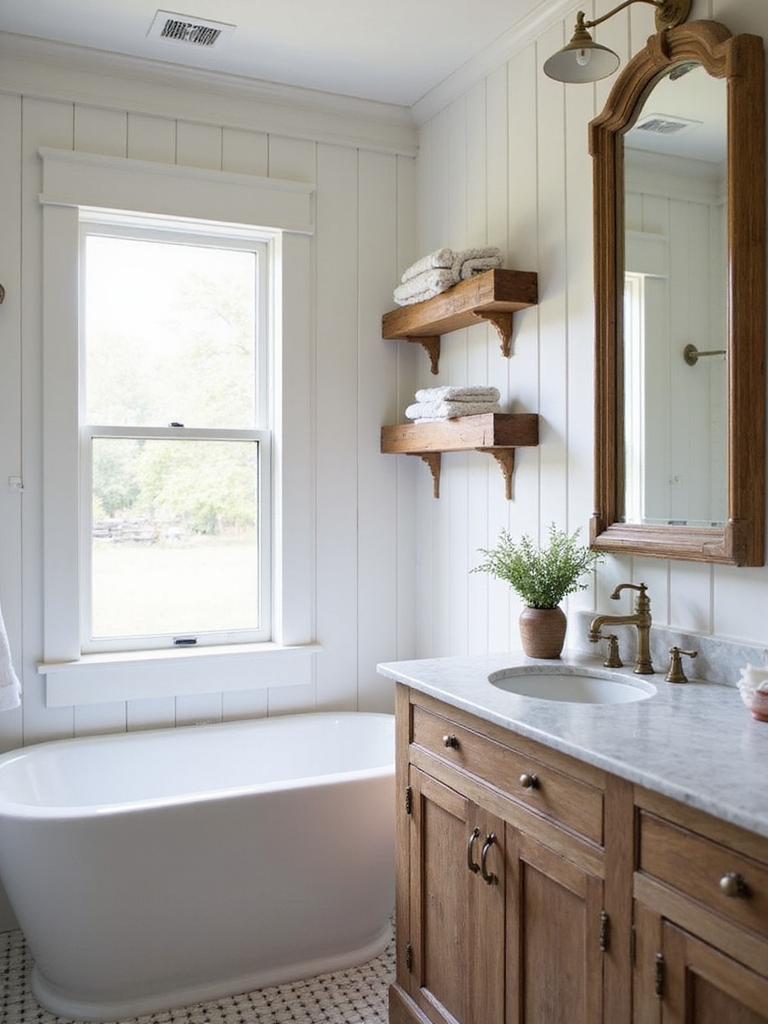
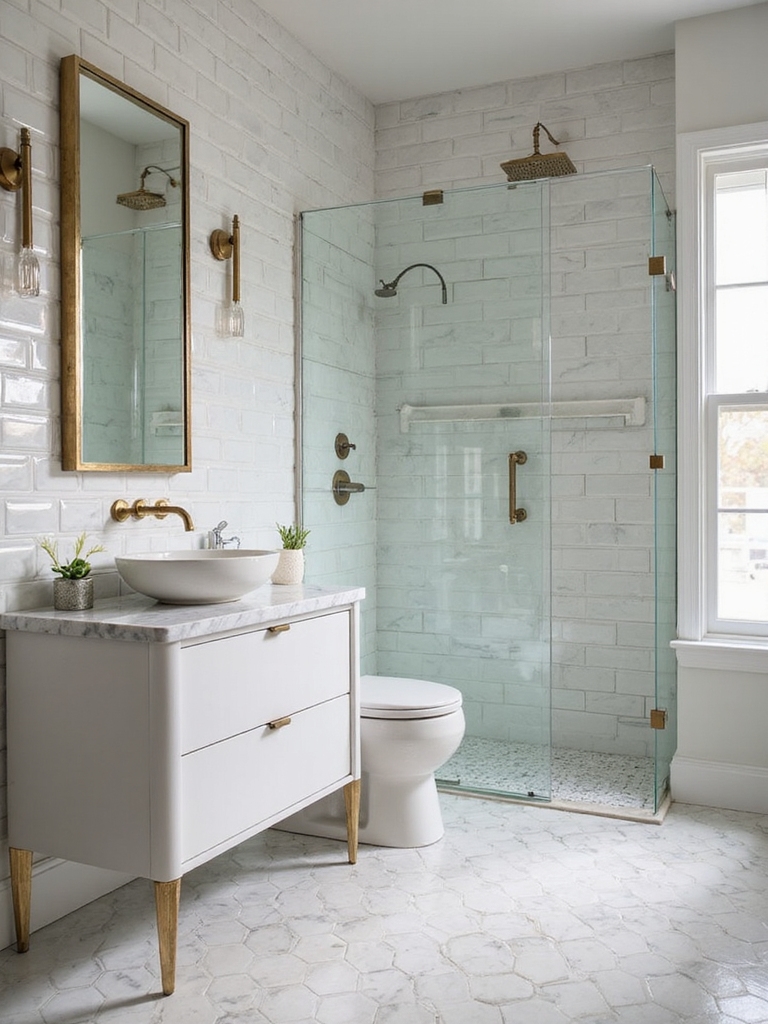
Start With a White Subway Tile Foundation
A white subway tile foundation sets a clean, timeless stage for any bathroom palette.
I start here because the crisp lines and bright reflectivity make textures and accents pop without shouting.
With a Classic Subway Start, we build versatility that looks fresh now and ages gracefully.
These tiles are a staple in many stylish bathroom designs, as seen in Floor and Decor inspirations.
White Tile Foundation
White subway tiles form a clean, timeless foundation that makes any bathroom feel brighter and larger.
I respect that base, and you’ll see how it anchors style while staying versatile.
Here are four quick benefits:
1) Brightness boost
2) Visual height
3) Easy maintenance
4) Budget-friendly foundation
Classic Subway Start
Stepping onto a white subway foundation lets us play freely with color, pattern, and texture.
I start simple, then add personality: a bold accent, a varied grout, or unexpected shapes.
With this classic base, your choices stay adaptable, clean, and chic.
I guide you toward balanced contrasts, practical seams, and a timeless feel that keeps tiny baths feeling spacious and bright.
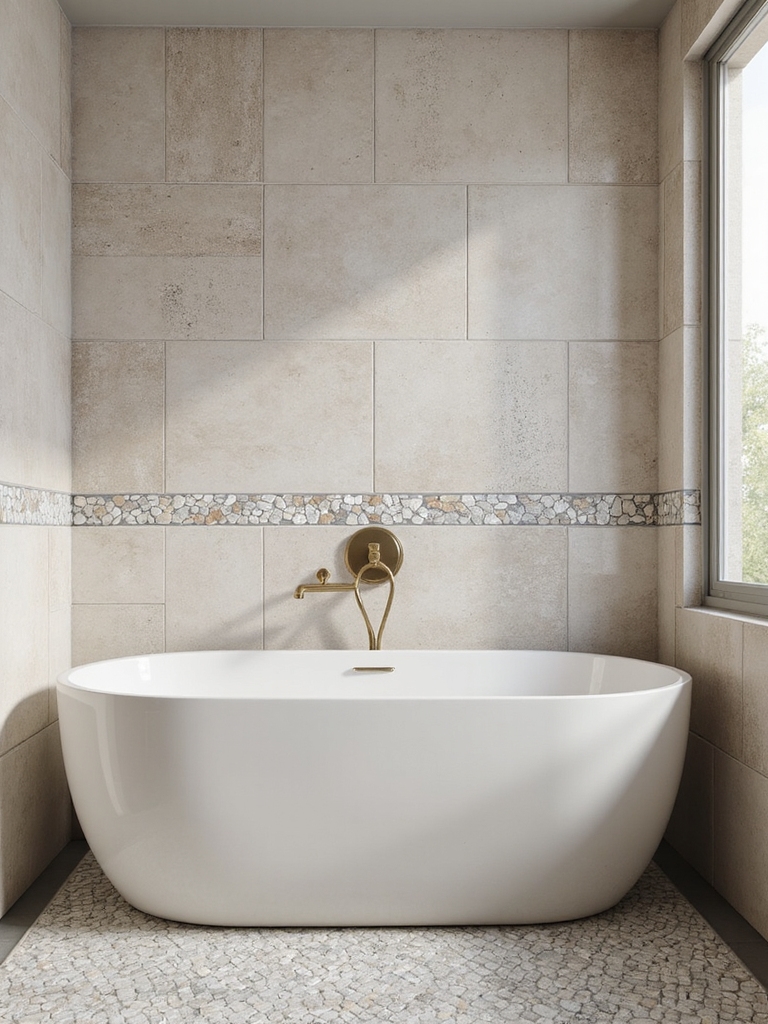
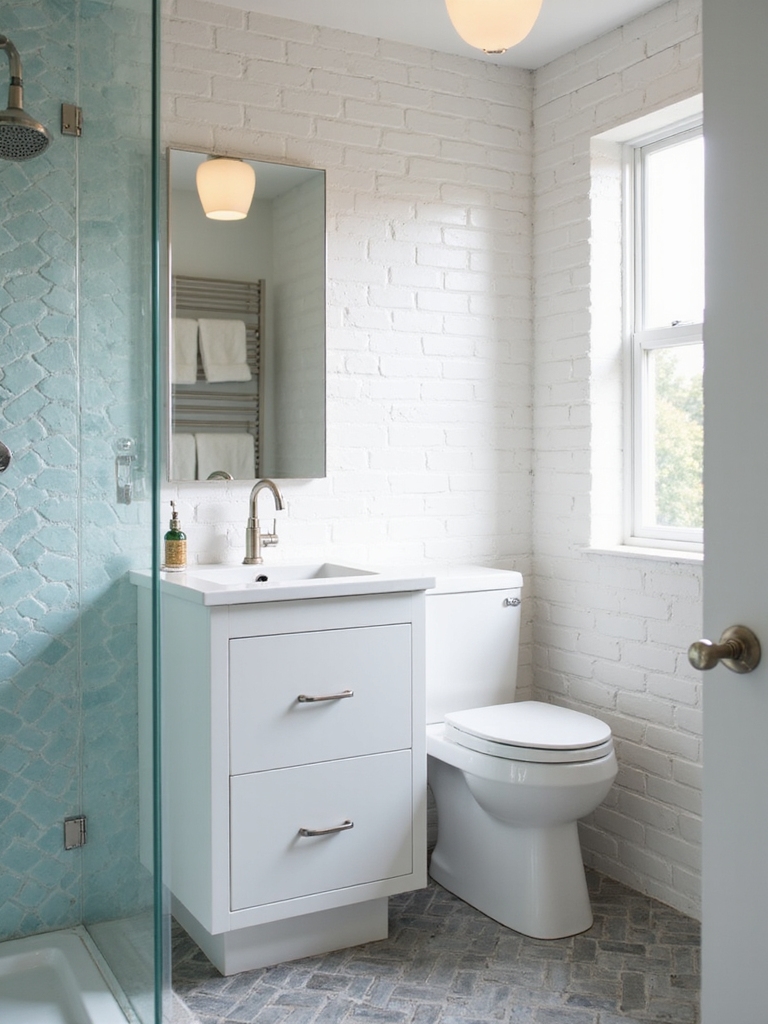
Add Texture With Mosaic Accents

Texture pops when you weave in mosaic accents.
I love tiny tiles that catch light and add personality without crowding the space.
Here’s how to use them:
- Pick a focused pattern
- Choose complementary grout
- Mix textures for depth
- Keep large surfaces simple to breathe
Playful, polished, and precisely balanced for a small bath.
Incorporating stunning terrazzo tile can elevate the look with unique patterns and vibrant colors.
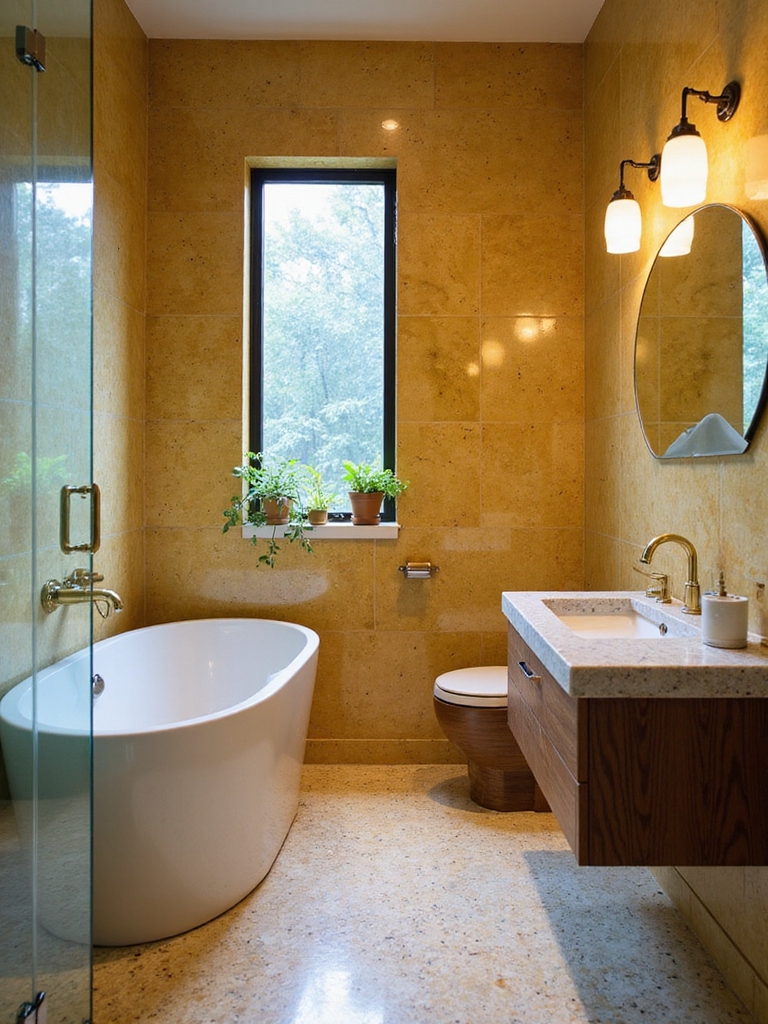
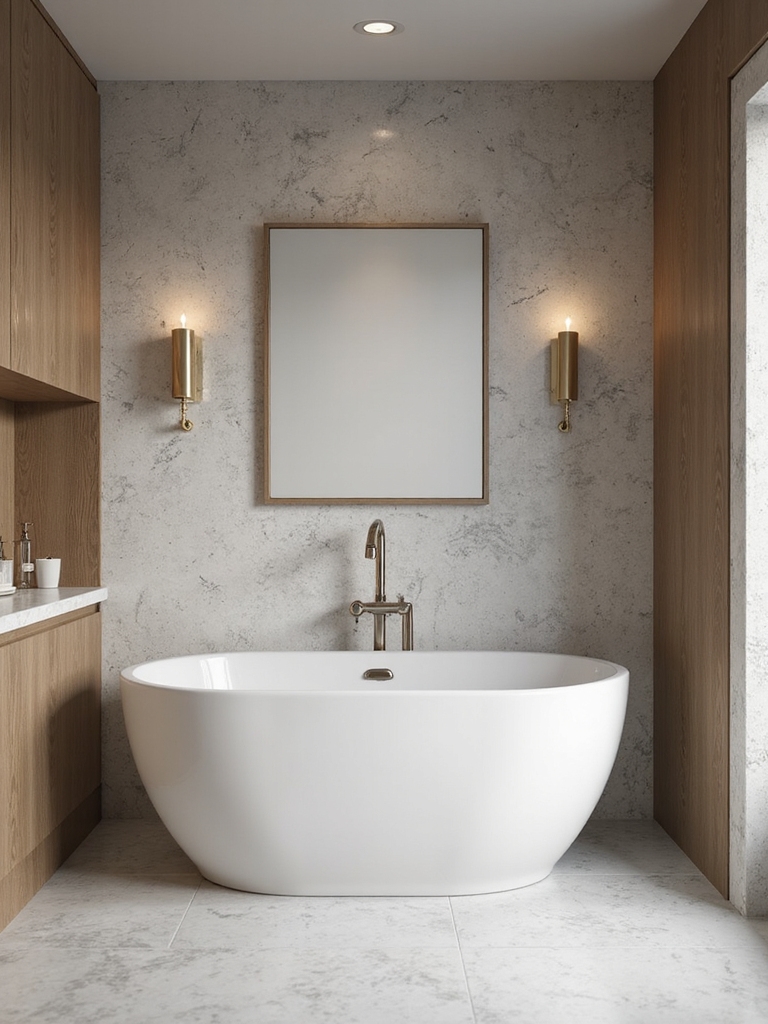
Extend Tile Up the Walls for a Spacious Feel
Extending tile up the walls instantly broadens a bathroom, and it doesn’t have to feel clinical.
I love this trick because it visually soaks the room in continuity, minimizing extra joints. Choose a single, light tone, tile nearly to the ceiling, and add a slim, reflective trim.
The result feels airy, cohesive, and surprisingly inviting for everyday routines. Incorporating harmonious bathroom tile ideas for both walls and floors ensures a balanced and aesthetically pleasing space.
Use Vertical Patterns to Grow the Perceived Space
Vertical patterns are a clever shortcut to lift the eye and the mood in a small bathroom.
I’m sharing simple, playful ideas you can try today.
- Run vertical stripes or stacked tile to elongate walls.
- Install a vertical accent stripe to draw attention upward.
- Use tall cabinets with slim, vertical silhouettes.
- Choose grout that emphasizes vertical lines, not breaks.
Additionally, incorporating innovative storage solutions can help in maximizing your tiny bathroom space while maintaining style and functionality.
Choose Large-Format Tiles to Cut Grout Lines
Large-format tiles are a smart shortcut to fewer grout lines and a cleaner look.
I love how they create a seamless feel, making a small bath look bigger. I pick full tiles for walls and floors, minimize cuts, and hide imperfect surfaces with fewer joints.
You’ll enjoy quicker installs, easier maintenance, and a fresh, modern vibe. Stylish bathroom floor tile ideas often emphasize the impact of choosing the right tile size and layout to transform your space with floor tile ideas.
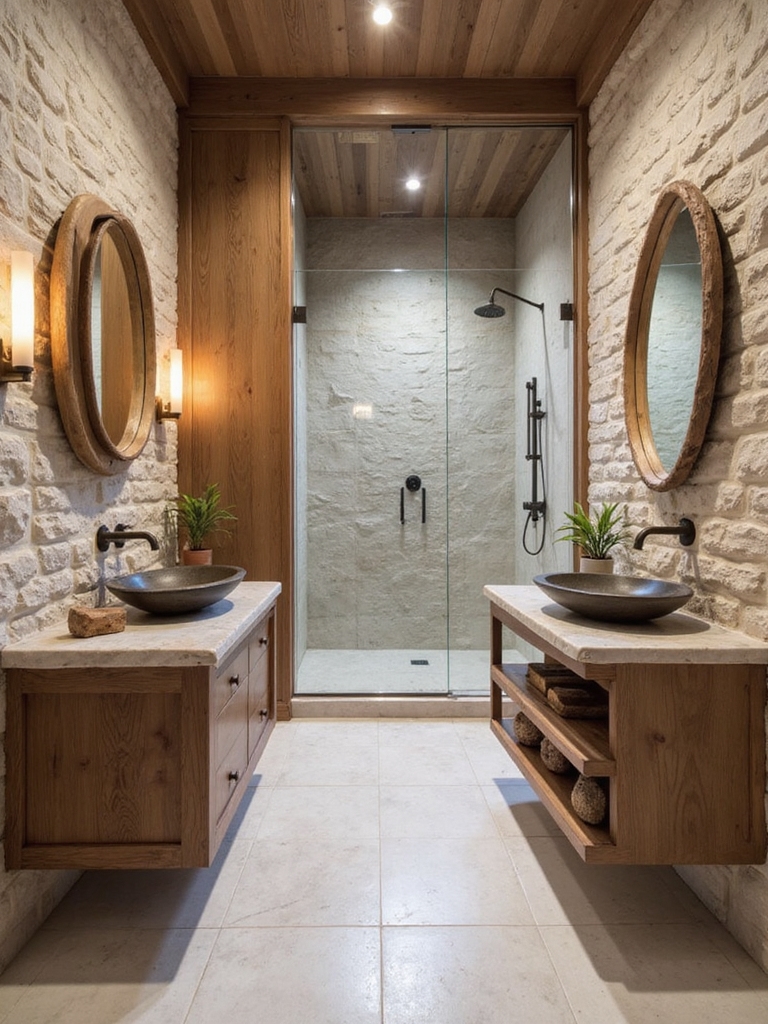
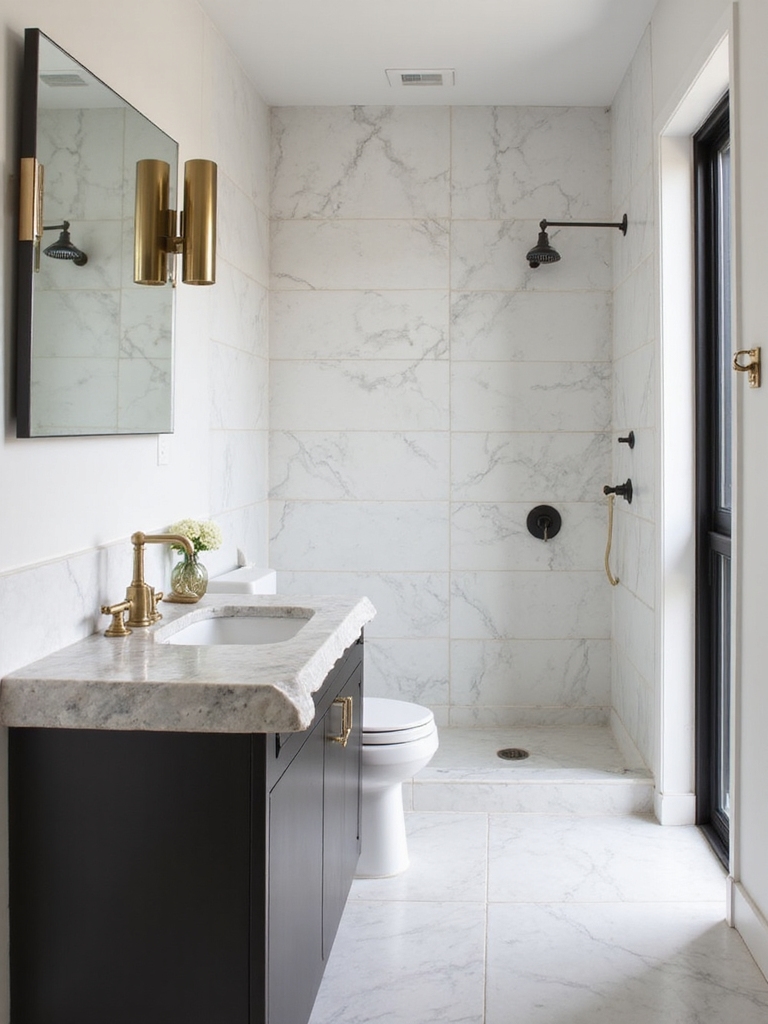
Mix Matte, Gloss, and Natural Stone for Depth
Mixing matte, gloss, and natural stone adds instant depth and personality to a bathroom.
I guide you through textures that catch the eye and feel luxurious without shouting.
Ready-made combos you can try:
1) Matte wall tile with gloss accents
2) Natural stone base with matte shower niche
3) Gloss flooring contrasting with matte vanity
4) Stone mosaics paired with matte trims
These modern bathroom tiles design ideas create a stylish and cohesive look that everyone saves for inspiration.
Color Your Bath With Calm Neutrals
I’m sharing tiny, doable swaps—simple paint undertones, soft towels, and matte fixtures—that keep the room airy.
I’ll guide you toward cohesive vibes without overpowering tiles, so your space reads tranquil, polished, and effortlessly inviting every time you step in.
Incorporating small bathroom floor tile ideas can further maximize your space and enhance the overall aesthetic.
Create a Bold Tile Shower Surround
Bold tile showers are where you can really make a splash.
I’m excited to show you a bold surround that wows without crowding.
Here are four crisp ideas:
- Large-format tiles for a seamless look
- high-contrast grout to pop color
- geometric patterns for rhythm
- moody blue or emerald hues for depth
Consider incorporating stylish tile ideas for showers and tub surrounds to enhance the overall bathroom aesthetic.
Back the Sink With a Nook Tile Backsplash
I’m thinking about how a nook tile backsplash behind the sink can set the tone, starting with texture that catches the eye.
We’ll weigh grout color options that either vanish or pop, so the wall and cabinet play nicely together.
And yes, lighting matters—the right glow can make even a small nook feel bigger and brighter.
Incorporating trendy bathroom tile floor ideas can further elevate the overall aesthetic of your space.
Nook Tile Texture
A nook tile texture behind the sink can be the unsung hero of a small bathroom upgrade.
I love how it adds depth, catches light, and hides minor splashes without shouting.
Here are quick ideas:
- Subtle microtexturing for softness
- Glossy white for brightness
- Chevron lay for movement
- Neutral grout for seamless flow
Grout Color Choices
Grout color can make or break the effect of your nook tile backsplash, so pick a shade that either blends in or pops with your sink area.
I lean toward coordinated neutrals for a seamless look, or a bold contrast to define the backsplash.
Test samples on a small patch, then choose a grout that stays clean longer and feels intentional.
Lighting Impact Starts
When you back the sink with a nook tile backsplash, lighting becomes the spotlight it deserves.
I’ll show you how this small feature creates big impact, quickly and cleanly.
- Choose warm LEDs for cozy reflections
- Install under-cabinet strips to curb shadows
- Use glossy tiles to bounce light
- Add dimmer for mood and function
Achieve a Floating Look With Narrow Shelving Tiles
Imagine this: a bathroom that feels lighter and bigger because the shelves seem to float just above the tile, not cling to it.
I use narrow shelving tiles to create that illusion—thin profiles, discreet grout, and cool reflections.
I mix matte tiles with a glossy edge for subtle contrast, keeping clutter invisible.
The result: calm space, clear lines, and practical charm.
Tile the Whole Room: Full-Tloor and Full-Wall Ideas
Floating shelves set a calm stage, but sometimes you want the whole room to feel like that serenity—no busy edges, just a seamless expanse.
I’ll share full-floor and full-wall ideas that stay cohesive and chic.
- Use a single tile family from floor to wall for continuity
- Choose low-sheen finishes to hide seams
- Extend grout lines sparingly for a quiet blend
- Add a focal wall with subtle texture variation
Patterned Tiles as an Accent Wall
I love how a bold pattern becomes the room’s focal point without overwhelming space.
Pair subtle neutrals with a single patterned panel, keep grout light, and balance scale with fixtures.
A well-placed tile motif adds charm, depth, and character—yet remains fresh and thoughtfully curated.
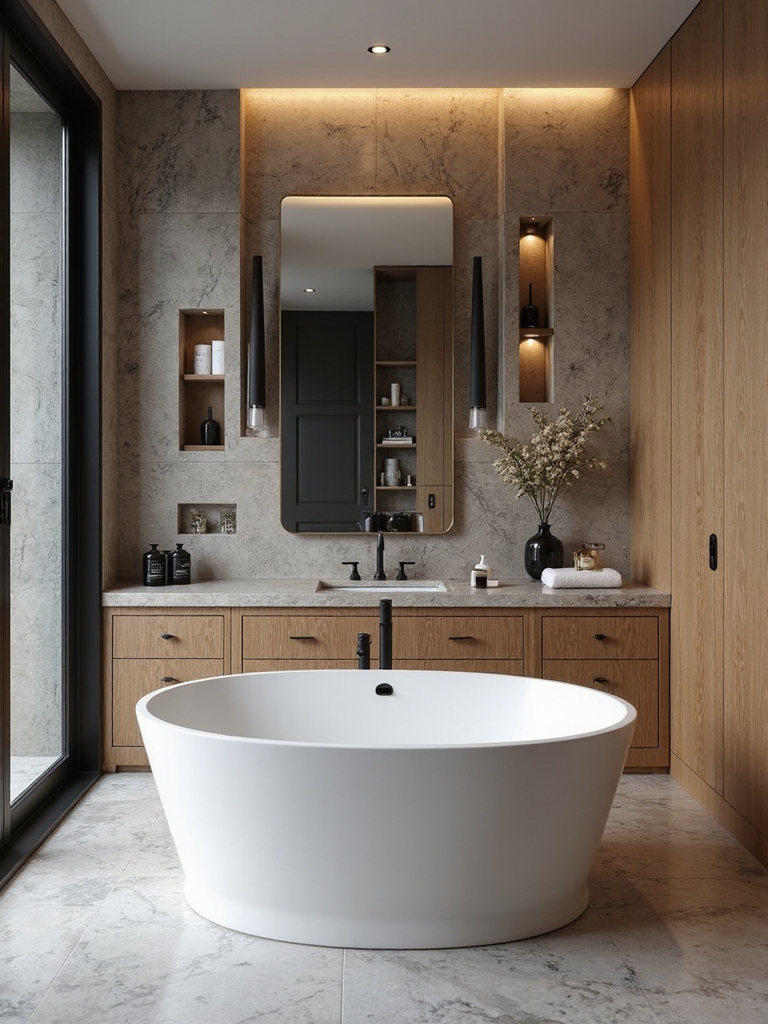
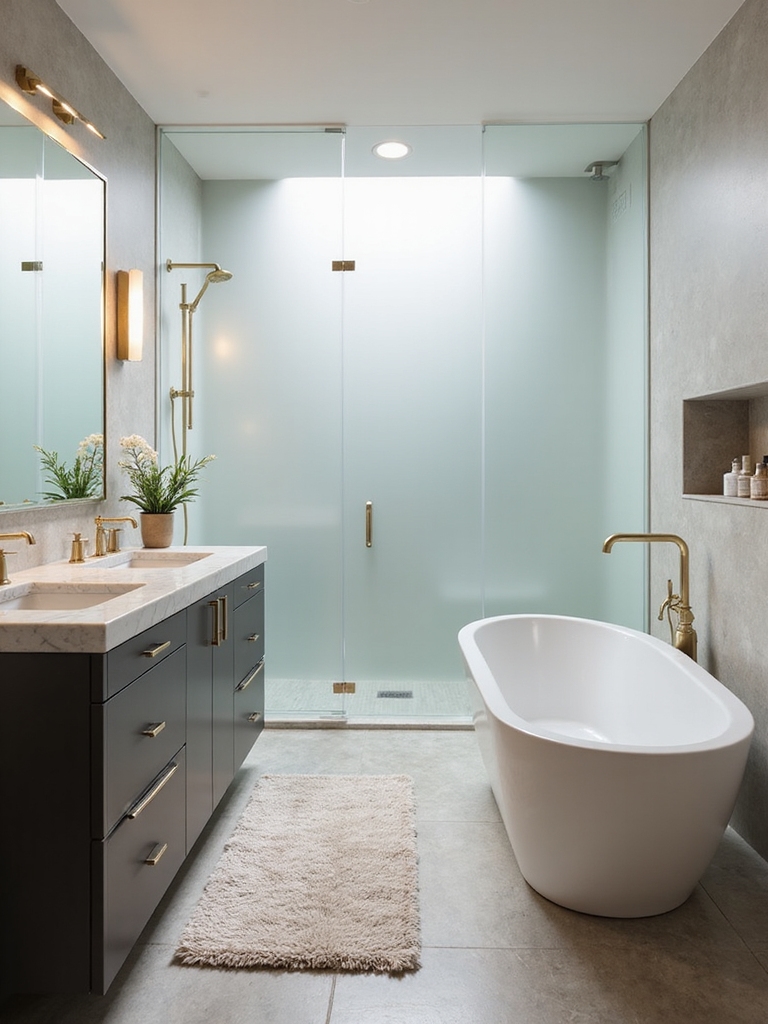
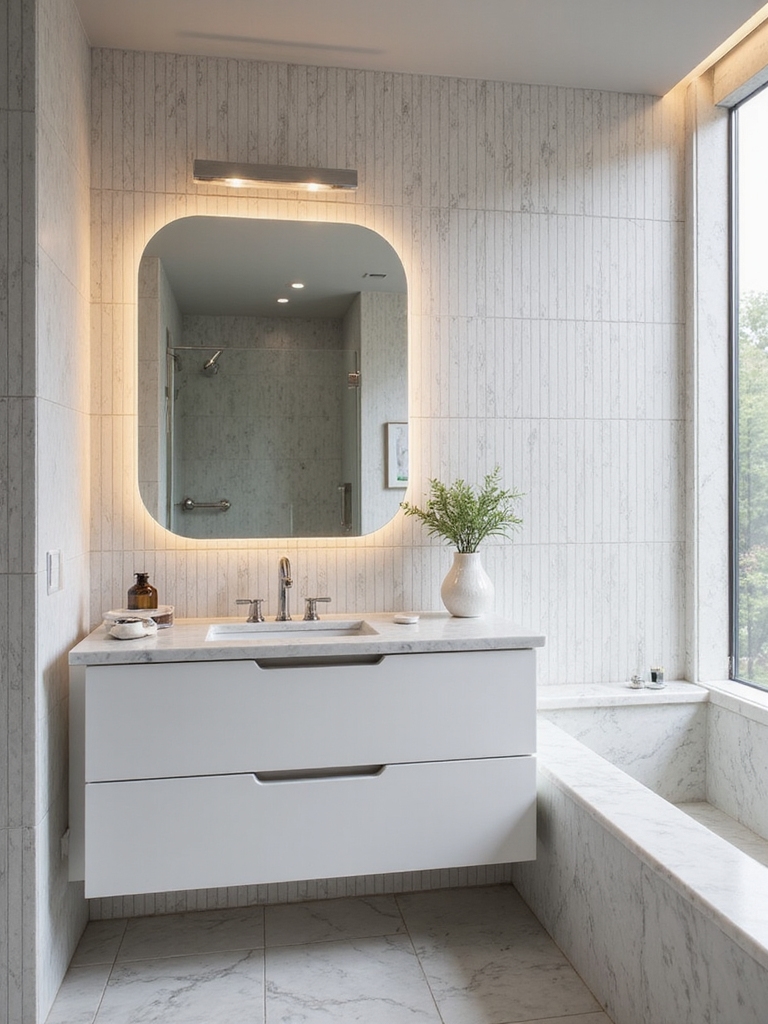
Go Monochrome for Seamless Coherence
I love a monochrome palette for that seamless, spa-like vibe, where harmony between tiles feels effortless.
I’ll show you how to balance subtle pattern with clean, seamless shifts so every wall reads as one continuous canvas.
Together, we’ll tune the pattern subtlety and keep the space crisp and cohesive.
Monochrome Palette Harmony
Monochrome palettes aren’t cold and clinical when you use them with intention; they’re a quiet superpower for a bathroom that feels cohesive and calm.
- Build contrast with varied textures
- Mix matte and glossy finishes for depth
- Add a single accent shade for life
- Keep grout clean to preserve seamless flow
Seamless Tile Transitions
Seamless tile shifts are the tiny trick that makes a monochrome bathroom feel endlessly cohesive.
I guide the eye with uniform grout, matched hues, and uninterrupted runs from shower to vanity. You’ll notice cleaner lines, fewer breaks, and a calmer vibe.
I pair formulas you’ll love—rarely flashy, always intentional—so changes feel natural, not forced, in your serene space.
Pattern Subtlety Balance
Pattern is subtle, but its impact is bold: a monochrome palette lets texture and form do the talking while you keep the room feeling serene.
I guide you toward balance that feels effortless, not fussy. Here’s how:
- Match tile shapes for rhythm
- Vary finishes to reveal depth
- Use grout sparingly to unify
- Add a single bold accent sparingly
Subtle Shine From Metallic Grout
Metallic grout catches the light in just the right way, giving bathroom tiles a quiet, understated shimmer that doesn’t shout.
I love how a hint of metallic elevates simple patterns without overpowering them. The glow is subtle, not flashy, and it plays with shadows as you move.
Keep it balanced: small bands, clean lines, and a calm, cohesive vibe.
Peel-and-Stick Tiles for Budget Upgrades
I love a budget-friendly upgrade, and peel-and-stick tiles make it feel like a mini renovation with minimal fuss.
They’re quick to install, mess-free, and surprisingly durable for everyday bathroom use.
If you’re chasing fast, polished vibes without the chaos, this is a hands-on option worth considering.
Budget-Friendly Peel-and-Stick
Peel-and-stick tiles are my go-to for budget-friendly bathroom upgrades, delivering a fresh look without a hefty price tag.
I’m sharing four quick wins you’ll love:
1) Simple patterns that trick the eye
2) Peel-and-stick backsplashes for easy charm
3) Durable, water-resistant options
4) DIY-friendly installation that saves time
Ready to refresh without breaking the bank.
Quick, Mess-Free Updates
If you’re after a quick, mess-free upgrade, peel-and-stick tiles are a game changer for budget renovations.
I love how simple they are: measure, peel, press, and you’re done. They shield walls, refresh backsplashes, and echo tile vibes without grout drama.
I’ll guide you to clean corners, alignment tips, and sealing tricks for long-lasting shine.
Easy-Clean Surfaces With Glazed Finishes
Glazed tiles are a champ at staying clean, and their smooth, glassy surface makes wipe-downs a breeze.
I love how effortless maintenance feels, and you’ll too—straightforward care, minimal effort, lasting shine.
- Wipe with a damp microfiber cloth after showers
- Use pH-neutral cleaner for daily quick cleans
- Dry surfaces to prevent water spots
- Seal high-traffic panels yearly for protection
Plan Grout Color to Hide Maintenance
Grout color is a secret weapon for low-maintenance bathrooms. I pick a shade that blends with tile so dirt hides in plain sight, not shouting for attention.
A lighter grout feels airy, a darker one masks stains, and either way I’ll seal edges to curb grime.
You’ll notice less cleaning, more relaxing, sparkling every time you step in.
Lighting Tips to Complement Tile Size and Shine
Lighting can make tile size feel intentional and its shine sing. I’ll guide you, reader, with clear, punchy tips that keep focus on size and glow without clutter.
- Use warm LEDs to soften grout and enhance sheen.
- Place vanity light to minimize shadows on small tiles.
- Install recessed ceiling lights for even coverage.
- Choose reflective surfaces to boost perceived tile size.
Budget-Smart Tile Layouts That Look Custom
Cutting costs doesn’t have to mean cookie-cutter tiles.
I’m showing you budgets-friendly layouts that feel custom without the price tag. Think herringbone tricks, varied grout, or a faux-larger-patio grid with a centered focal point.
I’ll guide you through smart pattern choices, scale, and color-play that read luxe. You’ll get polished, doable ideas you can actually install this weekend.
Conclusion
Tiny bathrooms feel grand when tile does the talking. I see you, designing with white subway calm, then teasing texture with mosaic sparks. I love how extending tiles up and stacking vertical patterns tricks the eye, while glazed surfaces keep it easy-breezy. Grout isn’t just grout; it’s a quiet anchor, hiding fingerprints and time. Budget or luxe, the space grows, not by square footage, but by perspective—a playful, practical luxury you can live in.