I’ve mapped out 17 bathroom shower remodel ideas that balance budget, durability, and design so you get a beautifully efficient, low-maintenance space that’s worth every penny. I’ll show you how to set a realistic budget with a cushion, rethink layouts for better flow, and tackle quick cosmetic upgrades with big impact. You’ll find space-saving doors, smart lighting, and durable materials like stone, porcelain, and glass. Stick with me for practical steps that keep costs in check and results lasting. You’ll learn more soon.
What Makes a Shower Remodel Worth It
A shower remodel is worth it when it transforms daily routines into a smoother, more enjoyable ritual.
I’m speaking to you as a neighbor, practical and hopeful. It’s about better water flow, durable surfaces, and minimal maintenance that frees time.
You’ll savor consistency, warmth, and fewer headaches, turning routine into a small daily celebration without endless upkeep or regret.
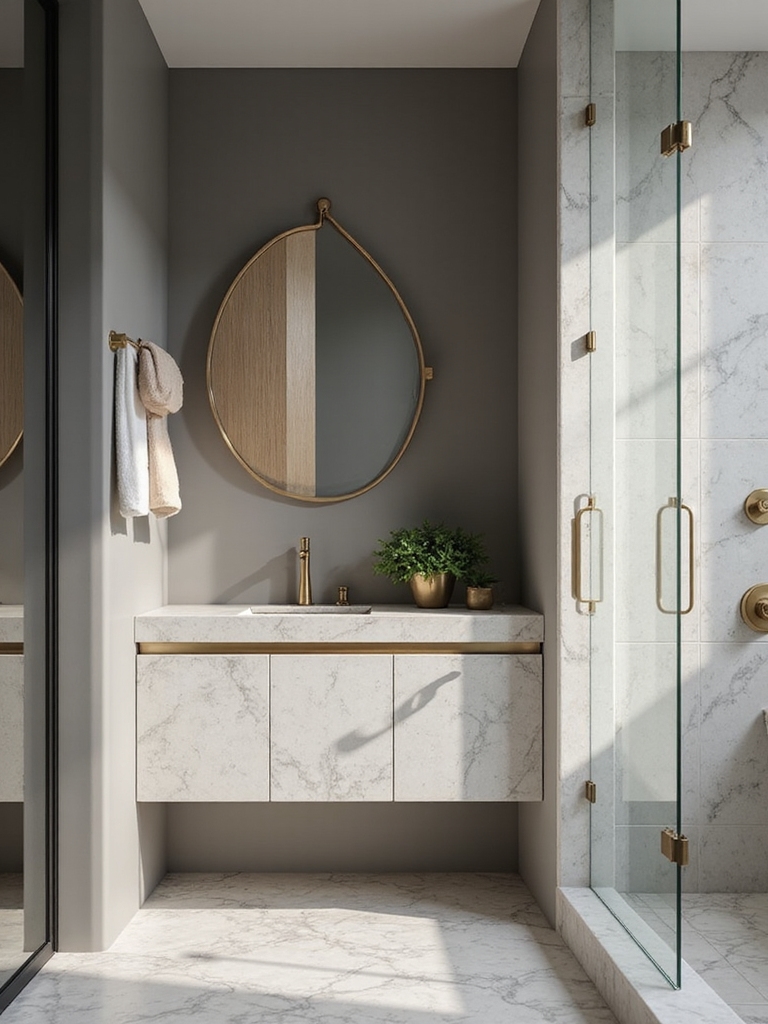
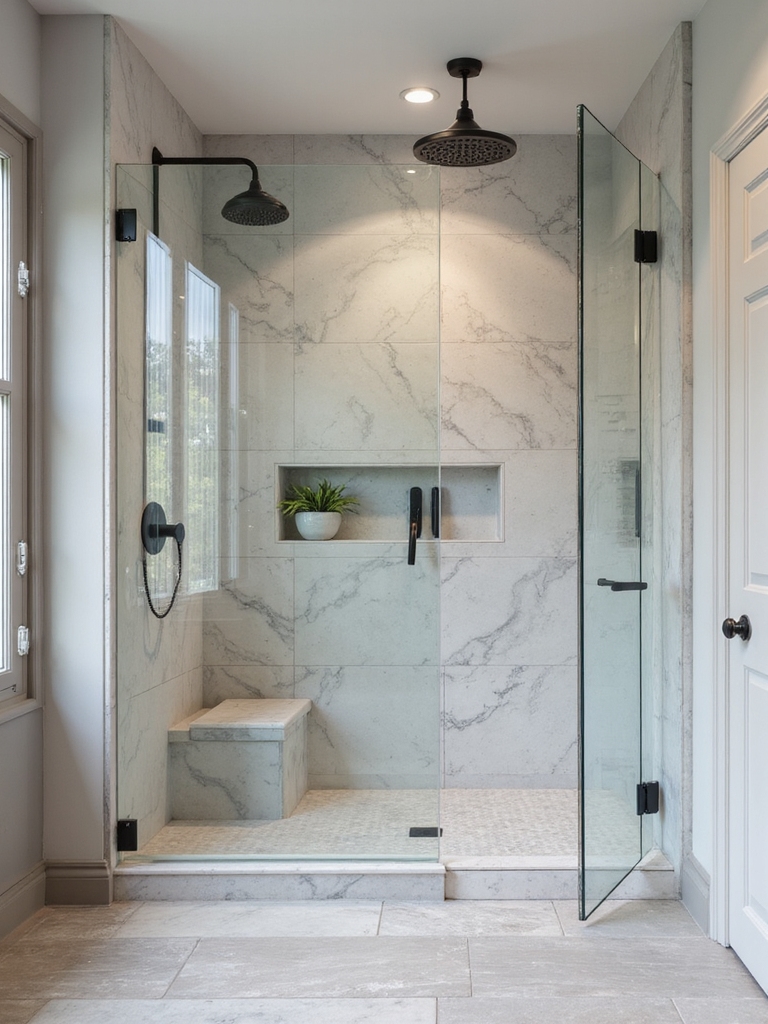
Incorporating a walk-in shower design can maximize space and elevate the overall look of your small bathroom.
Set Your Budget and Identify Early Savings
Before you pick fixtures or materials, lock down a realistic budget—and build in a cushion for surprises—so you won’t derail the project when costs shift.
I outline core line items, then add a 10–15% contingency for unexpected needs. Track every penny, compare quotes, and resist premium upgrades that don’t deliver value.
Early savings: refinish instead of replace, shop sales, and optimize timing. Incorporating budget-friendly ideas can help you transform your bathroom without overspending.
Reimagine Layout for Better Shower Flow
Rethinking the shower layout starts by sizing up how you move in and out, not just what you install.
I map doorways, niches, and bench placement to reduce steps and drips, then test clearances at peak use.
We’ll balance water control with accessibility, choosing a seamless enclosure and logical drain flow.
Smart spacing elevates comfort without complicating maintenance.
Incorporating walk-in shower ideas can dramatically enhance both the style and functionality of your bathroom remodel.
Quick Cosmetic Upgrades With Big Impact
Small changes can deliver big results, and the quickest wins here prove it: I start with fresh caulk lines, upgrade fixtures, and refresh surfaces to revive the shower’s look without a full gut.
I choose matte hardware, crisp lighting, and simple, durable materials. Practical shifts spark confidence, elevating mood and usability while keeping the remodel affordable, focused, and proudly attainable.
Incorporating easy remodeling ideas can transform your bathroom with minimal effort and maximum effect.
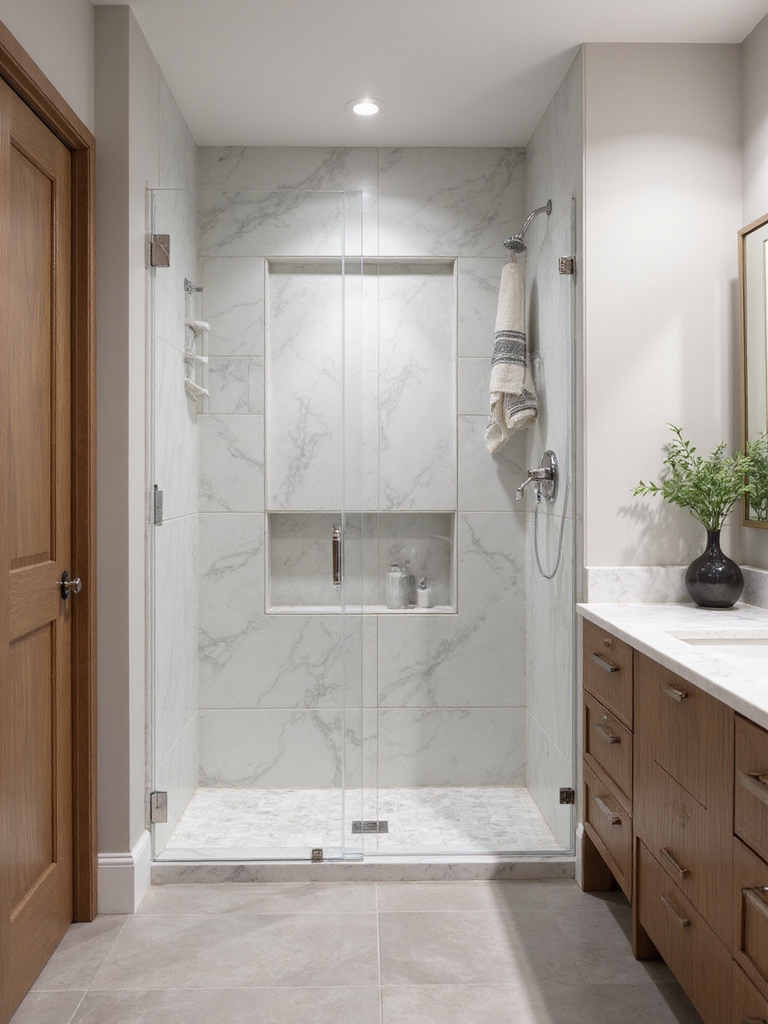
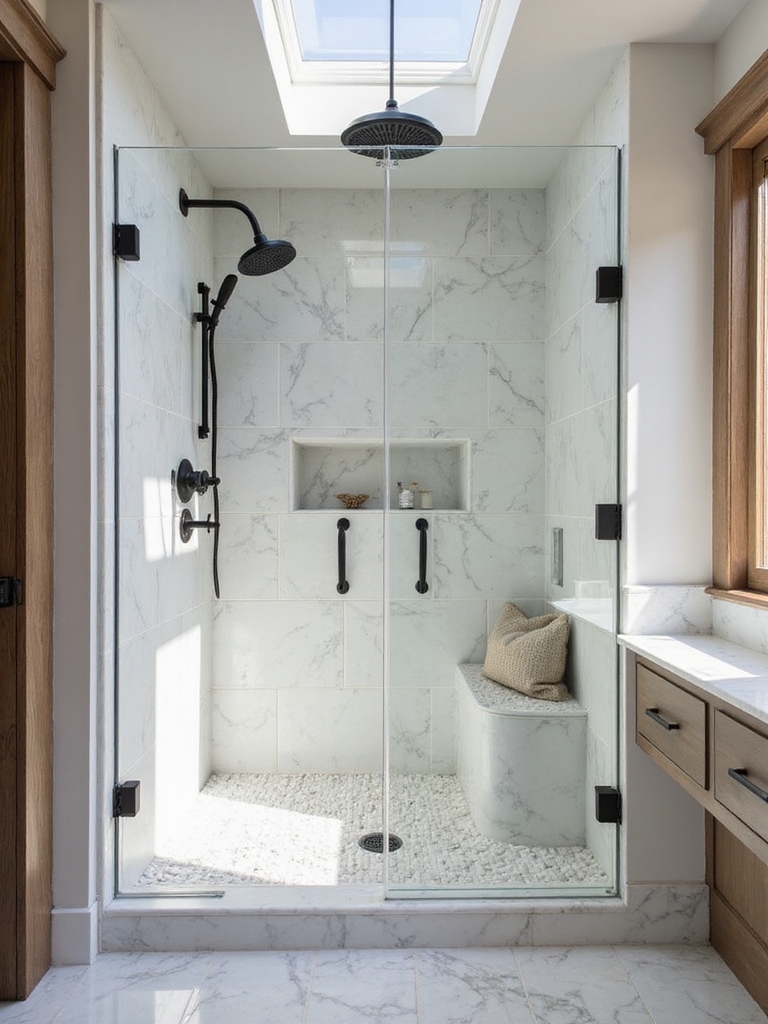
Choose Space-Saving Shower Doors and Enclosures
I’m choosing space-saving door options that fit my shower footprint without sacrificing style.
I’ll pair minimal hardware with clean lines and thoughtful enclosure design principles to maximize light and accessibility.
Let’s explore how compact doors and smart enclosures can make your bath feel larger and more practical.
Incorporating walk-in shower inspirations can add both coziness and functionality to even the smallest bathrooms.
Space-Saving Door Options
Ever considered how much a door choice can transform a tight bathroom?
I lean toward space-saving options that feel seamless, not compromise. Sliding or bi-fold doors maximize opening without crowding, while frameless glass enhances light.
If I want easy maintenance, I pick sturdy hardware and simple tracks.
The goal: a crisp, airy shower that elevates daily routines and resale appeal.
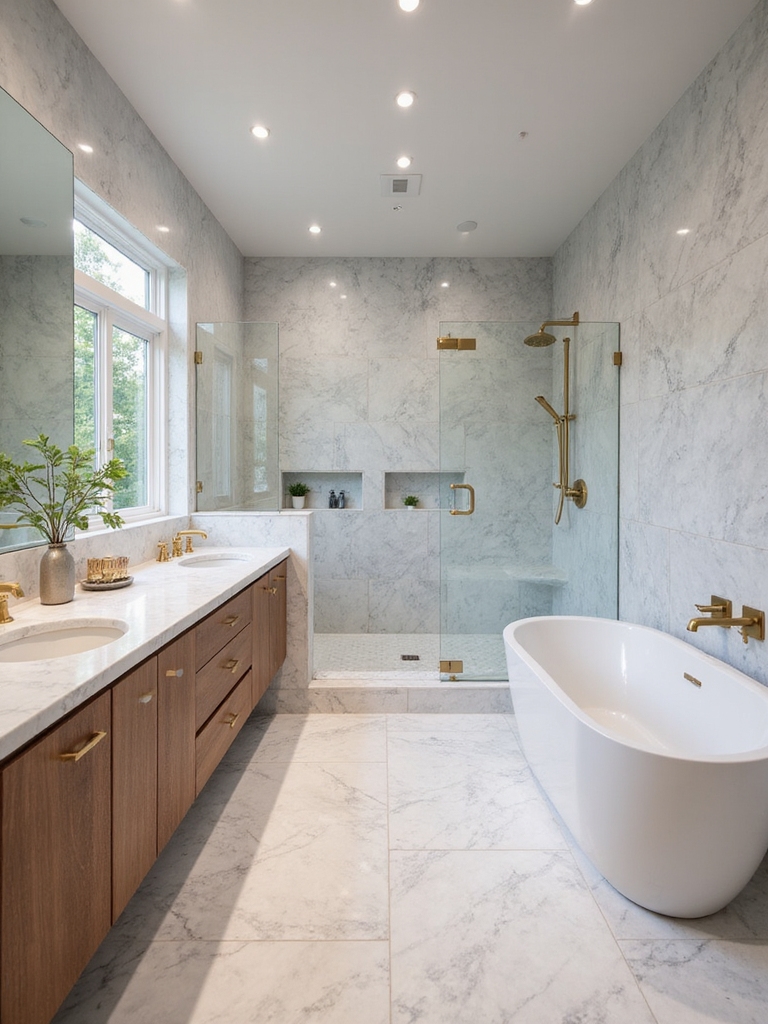
Enclosure Design Principles
When designing a space-saving shower enclosure, I prioritize doors and configurations that maximize openness without sacrificing function.
I balance glass, framing, and hardware to create a seamless, low-maintenance feel. Clear panels, minimal profiles, and smart corner corners reduce visual clutter.
Practical layouts guide water containment without crowding. The result is a calm, efficient, affordable upgrade you’ll enjoy daily.
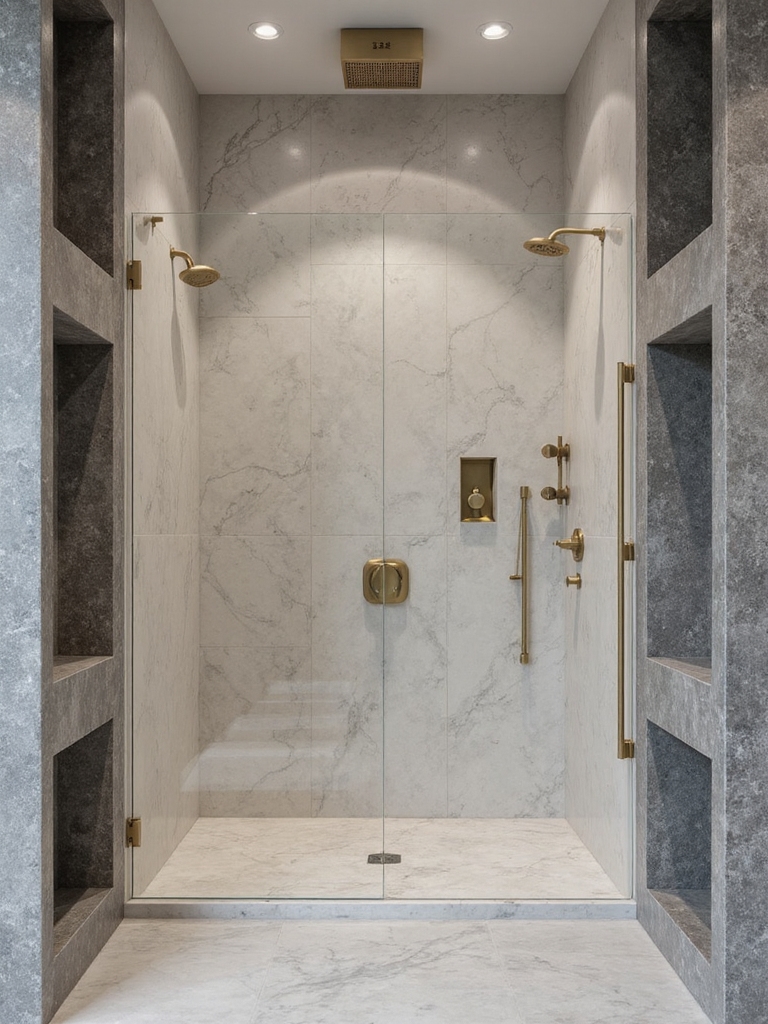
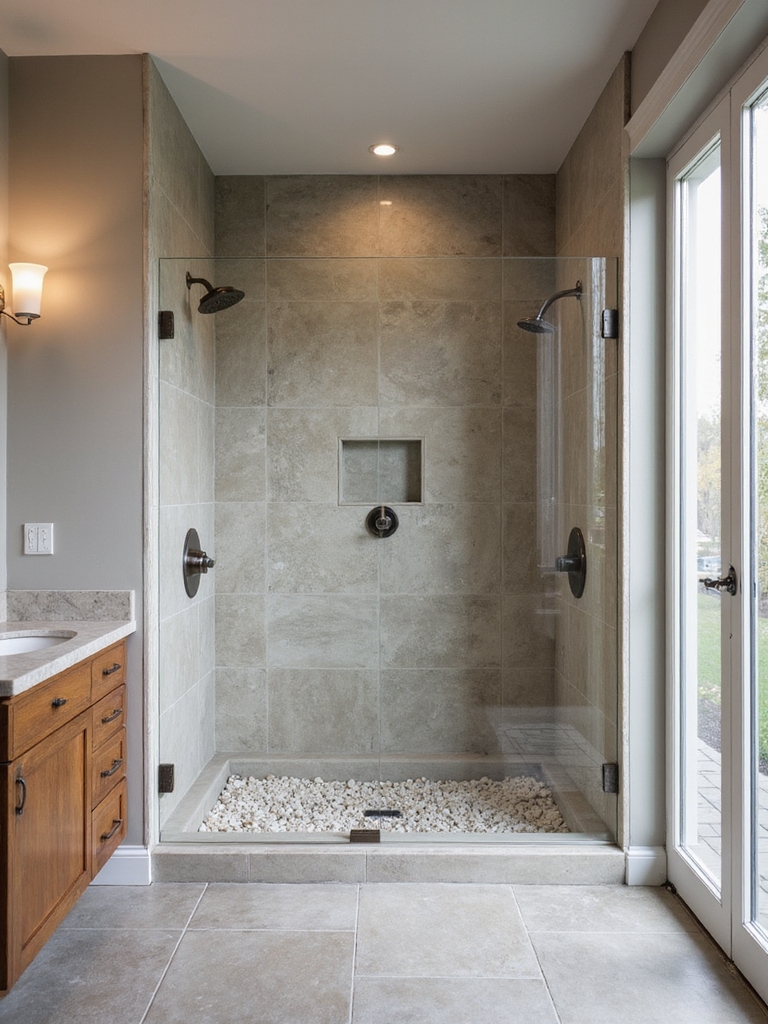
Durable Tile and Surface Options for Longevity
Durable tile and surface options matter most in a shower remodel because longevity saves time and effort in the long run.
I prioritize strong ceramic, porcelain, and full-body porcelain slabs, plus low-porosity glass or acrylic panels.
Sealed grout, proper substrates, and reputable installation prevent staining, cracking, and warping, so maintenance stays minimal while aesthetics stay sharp and timeless for years.
Incorporating stunning tile ideas can also elevate the visual appeal while ensuring functionality in your bathroom remodel.
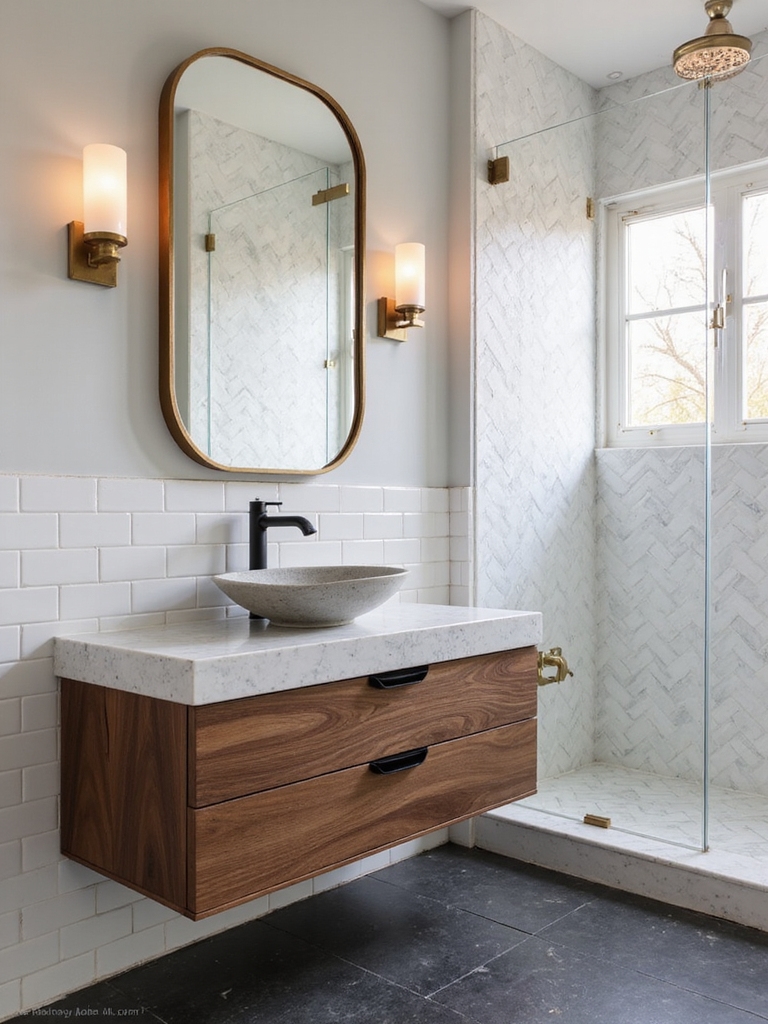
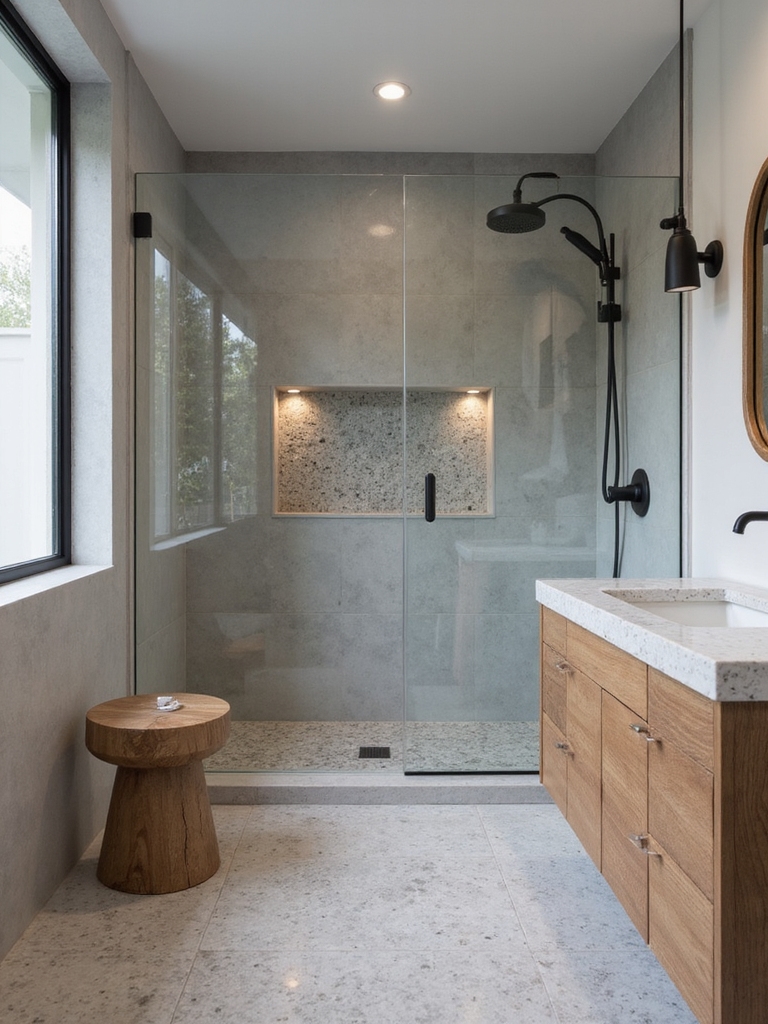
Luxe-Looking Tile Patterns That Save Money
Patterned tile and layout tricks can create a luxe look without a premium price. I’m sharing practical choices that stretch your budget: 12×24 planks, herringbone with a budget-friendly glaze, and alternating field tiles with a darker border for depth.
Focus grout color and precise cutting to maximize impact. You gain sophistication without overspending, achieving a polished, aspirational shower space. Exploring trendy bathroom tile flooring options can inspire creative layouts that enhance your remodel’s overall aesthetic.
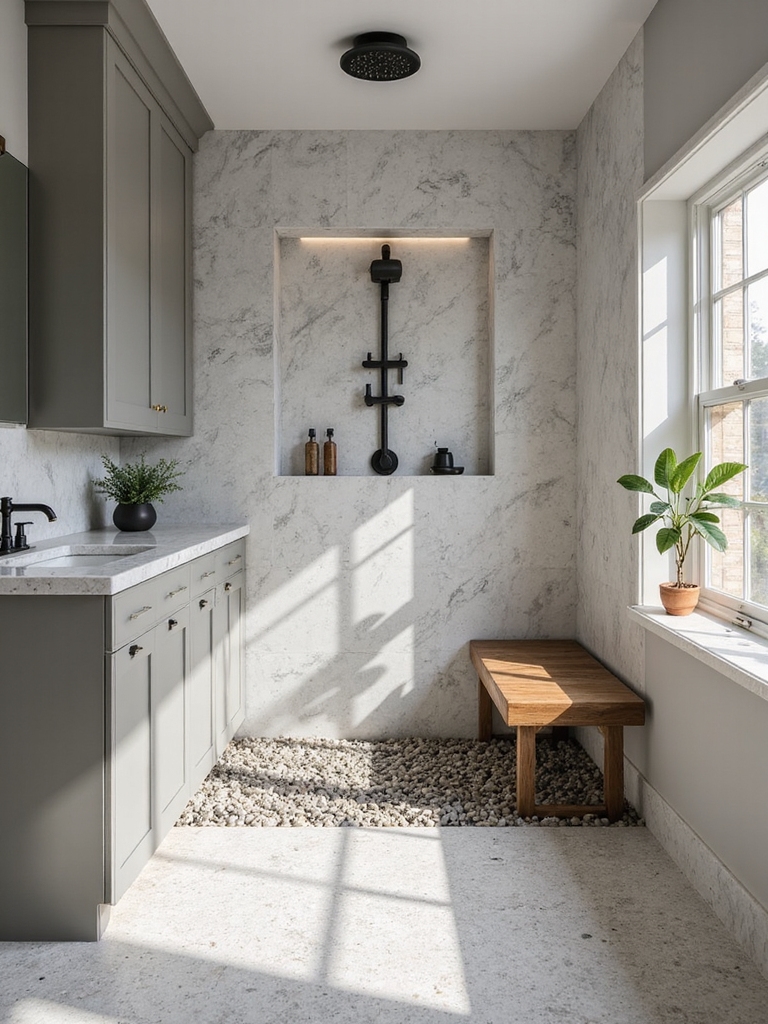
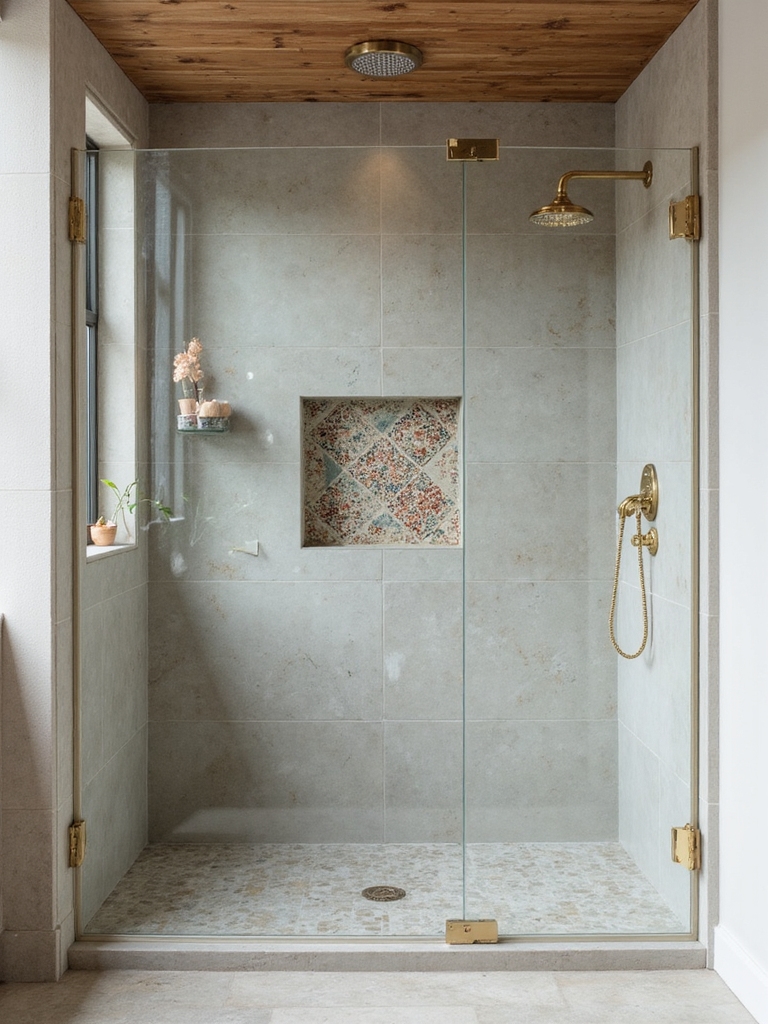
Built-In Storage: Niches, Benches, and Recesses
Built-In Storage in a shower isn’t an afterthought—it’s a design anchor that keeps everything you need within arm’s reach.
Niches, benches, and recesses simplify routines, reduce clutter, and elevate everyday rituals. I plan clever placements, durable materials, and seamless finishes so water stays out of corners and style stays front and center.
Practical elegance becomes a lasting, frustration-free habit. Incorporating smart storage solutions can maximize your bathroom space and make even small showers feel more spacious.
Shower Liners vs. Full-Tloor Waterproofing: Pros and Cons
I’ll walk you through the choice between liners and a full-floor wet barrier, focusing on coverage and longevity so you can pick confidently.
We’ll weigh installation effort and ongoing maintenance, and how each option stands up over time.
If you’re aiming for durability with fewer surprises, this quick comparison sets the stage for a smarter, cleaner remodel.
Incorporating these waterproofing options can be a key step in your transform your bathroom journey to achieve a total transformation.
Liners vs Wet Barrier
Liners and full-t floor waterproofing offer different paths to a leak-free shower, and choosing between them comes down to durability, maintenance, and install practicality.
I favor liners for their quicker installs and lower upfront cost, yet a wet barrier wins with long-term reliability in high-traffic bathrooms.
You’ll balance ease today against lasting peace of mind for tomorrow’s showers.
Coverage And Longevity
When weighing coverage and longevity, the choice between shower liners and full-floor waterproofing hinges on how you value upfront certainty versus long-term resilience.
I weigh ease and cost now against lasting protection and potential repairs later. Liners offer quick confidence, while full-floor systems promise durable peace of mind.
Your goal, measured durability, should guide this practical, aspirational decision.
Installation And Maintenance
Shower liners install quickly and cost less upfront, but they require ongoing maintenance and periodic replacement.
In contrast, full-floor waterproofing demands more upfront planning yet delivers long-term resilience with fewer annual upkeep worries.
I weigh durability against flexibility, guiding you toward a choice that aligns with your habits and budget.
With clear steps, you’ll attain reliable protection and enduring shower comfort.
Water-Efficient Fixtures That Don’t Sacrifice Style
If you’re aiming to reduce water use without compromising style, start with fixtures that blend efficiency with design.
I select sleek, low-flow showerheads and thermostatic valves that conserve water while delivering steady pressure and reliable temperature.
Pair them with moisture-resistant finishes and minimalist forms.
You’ll notice less waste, smoother showers, and a more polished, aspirational bathroom that still feels luxurious.
Incorporating modern luxury bathroom ideas can elevate your space to a whole new level of elegance and comfort.
Grab-and-Go Shower Accessories for DIY Wins
I’ll show you grab-and-go essentials that make DIY showers feel accomplished in minutes.
These quick-install accessories become my go-to for efficiency and clean design, without sacrificing function.
Let’s explore practical, stylish options that turn small upgrades into big wins.
Grab-And-Go Necessities
Stretching a tight bathroom project feels doable when you assemble a few grab-and-go essentials that simplify daily routines and keep the remodel momentum alive.
I keep a compact basket with soap, shampoo, and a quick-dry towel, plus a labeled organizer for screws and small tools.
These necessities streamline mornings, reduce backtracking, and maintain momentum toward a polished, finished space.
DIY Shower Essentials
Moving from grab-and-go bathroom basics to the shower specifically, I keep a small kit handy for the wet zone that speeds up mornings and reduces slip-ups during a remodel.
I stock essential, durable tools: a silicone squeegee, a compact caulking gun, a 30-minute shower timer, reusable labels, and spare cartridge seals.
These DIY-ready components streamline routines, boost progress, and inspire confident gains.
Quick-Install Accessories
If you’re aiming for a quick, durable upgrade, grab-and-go shower accessories keep the project moving without sacrificing quality.
I choose simple, reliable pieces that install in minutes and perform daily. This mindset minimizes downtime, maximizes results, and adds enduring value.
I’ll favor modular caddies, tension rods, and magnetic holders—practical upgrades that feel premium yet stay cost-conscious and invigoratingly straightforward.
Lighting for Mood and Clarity in the Shower
Lighting in the shower isn’t just about visibility; it sets the mood and enhances safety, too.
I’ll share practical ideas that elevate clarity and ambiance without clutter.
- Layered lighting with dimmable LEDs for flexibility
- Warm-cool balance using adjustable color temperature
- Waterproof sconces and recessed spots for even coverage
- Accent LEDs around mirrors to reduce glare and shadows
Ventilation and Humidity Control for Comfort
I know a well-ventilated shower is more comfortable and healthier, so I focus on ventilation efficacy and steady humidity control.
I’ll share practical tips to keep moisture in check without sacrificing style or quiet operation.
Let’s explore smart exhaust, balanced airflow, and simple humidity tricks that fit your remodel goals.
Ventilation Efficacy
Ventilation efficacy is about more than just venting—it’s about keeping humidity under control to protect surfaces and comfort the moment you step into the shower.
I focus on practical choices that deliver consistent airflow and rapid humidity drop.
- Accurate hood sizing
- Ducting with minimal bends
- Timed or humidity-sensing fan
- Quiet operation for daily use
Humidity Management Tips
Humidity controls aren’t just about turning on a fan—they’re about keeping every shower comfortable and surfaces pristine.
I’ll guide you to smart humidity habits: run ventilation during and after showers, seal gaps, wipe dry high-moisture spots, and choose moisture-resistant materials.
With consistent routines, humidity stays in check, reducing mold risk while you enjoy a spa-like, long-lasting remodel.
Privacy and Soundproofing Considerations
When designing a bathroom shower, prioritizing privacy and sound control helps you relax fully without feeling exposed or distracted.
I guide you with practical tweaks that quietly elevate comfort.
- Use solid core doors or dense panels to reduce noise transmission.
- Install a frameless glass with appropriate seals for visual openness and sound dampening.
- Add cushioned, textured mats to minimize echo and improve footing.
- Choose shower nook placement for natural retreat and focused solitude.
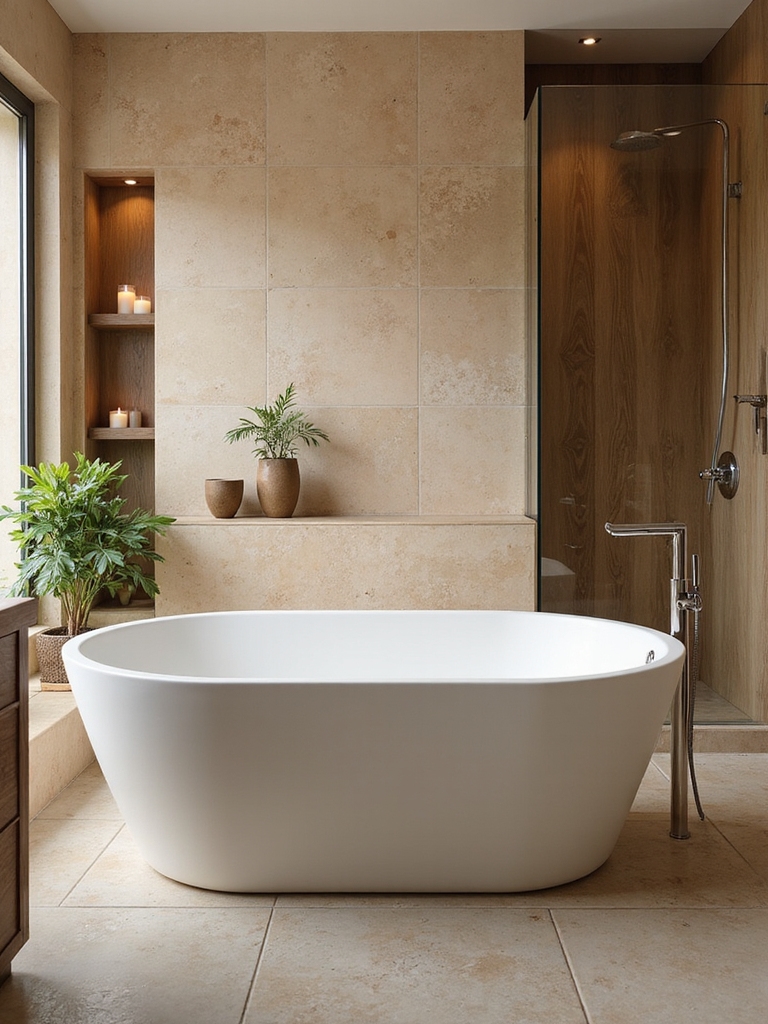
Material Choices: Stone, Porcelain, and Glass Guide
Choosing the right materials sets the tone for your shower and your daily routine, so I’ll walk you through stone, porcelain, and glass with practical clarity.
I’ll compare durability, maintenance, and mood, then align choices with your budget and style.
Stone delivers warmth and texture; porcelain offers sleek reliability; glass creates openness.
Together, they form an elevated, resilient, light-filled sanctuary you’ll love.
When to DIY vs. Hire a Pro
If you’re weighing whether to DIY or hire a pro, start with your project scope, budget, and timeline.
I’ll guide you toward practical choices that save time and stress.
- Assess complexity: plumbing, electrical, waterproofing risk
- Match skills to tasks: DIY for cosmetic updates, pro for structural work
- Budget realistically: factor tools, permits, waste disposal
- Timeline: allow buffer for setbacks or inspections
Maintenance Plan to Keep It Worthwhile
A practical maintenance plan keeps your bathroom shower remodel worthwhile by guarding against wear, leaks, and costly surprises.
I’ll guide you with simple checks, routine resealing, and timely replacements so nothing sneaks up on you. You’ll stay ahead of water damage, keep tiles shining, and preserve efficiency.
Follow a quarterly quick review, document fixes, and enjoy lasting beauty and dependable comfort.
Conclusion
Let me close with a simple symbol: a shower as a sunlit doorway. Your remodel is not just tiles and doors—it’s light finding new paths, a steady drip becoming a promise kept. When you plan, save, and choose wisely, you’re polishing a habit of care that reflects in every morning and every guest’s smile. It’s practical, aspirational work that pays dividends in comfort, privacy, and joy. Step through; the warmth awaits.